The following are some of the technical writing and / or documentation I’ve done over the years.
Douglas Gauck
selected works

In August of 1997 I was working at Kinko’s Corporate Headquarters as a Systems Engineer. In addition to running the test lab and QA process for the development of remote file submission software, I was also tasked with reimagining the way that copy and digital output jobs could be tracked throughout the production process.
These were the days of dial-up for most, DSL for a few, and maybe very expensive T1 lines for businesses that could justify the cost. Most Kinko’s branches were somewhere in the middle. It was clear that data connections would continue to increase in speed and quality, decrease in cost, and transition to an ‘always-on’ mode. See discussion on page 7 for a blast from the past.
The research and technical basis are still sound, and accessible even if you never worked at Kinko’s.
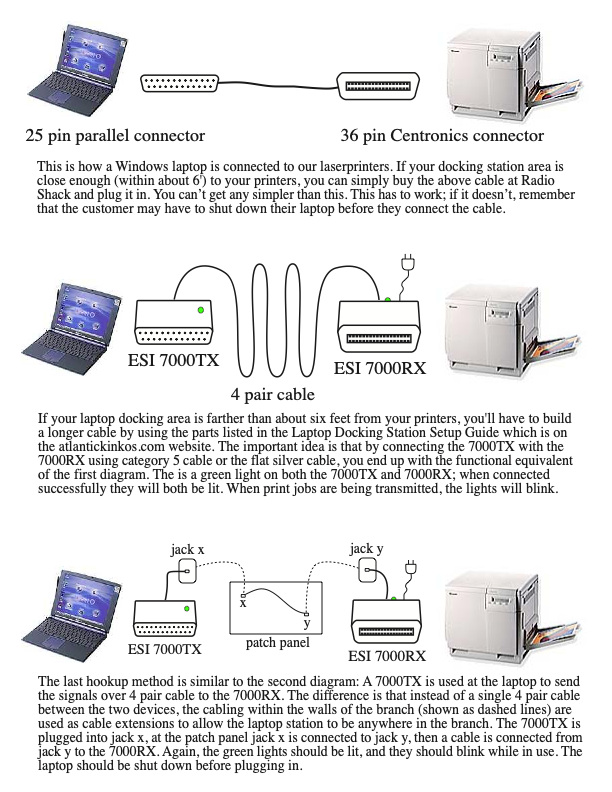
On the other end of the scope spectrum, here is a very simple one page reference for branch coworkers to help customers print from their laptops to branch printers.
I used stock photos for the laptop and printer, but created the line graphics to control the level of detail for this critical part of the document. The 25 dots within the trapezoids on the left are enough to identify them as the connectors that will plug into the parallel port of the laptop; the same is true for the depiction of the Centronics connector going to the printer. The three illustrations of the cabling between the ends and the explanatory text for each method provide sufficient detail for most of the intended audience to complete the installation. For those that are less technically adept, the document is simple enough that they will be able to determine which of the three cases is applicable for their branch and order parts accordingly.
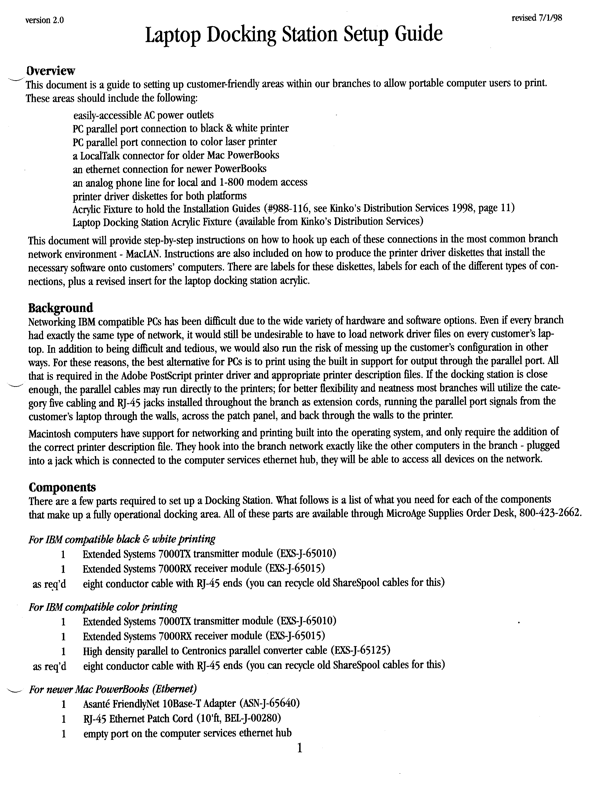
Here is the full fledged Laptop Docking Station Setup Guide. It goes into more detail about the hardware and software requirements for Macs and PCs, a more in-depth discussion of the various methods of connection and cabling, tips for creating a comfortable docking area, and even a list of parts and part numbers.
I created all of the graphics and wrote all of the text. Sadly, the only surviving copy I have is this scan of a printed version that suffered some formatting shifts.

I was part of the vintage arcade hobby, and in addition to collecting a few machines I also became a well-known technical resource for the community. This document details the procedure to replace the linear power supply in a particular game with a modern switching power supply.
There are many in the hobby that want to work on their old machines to make them more reliable but lack the electronics background to do so. This is written so that, if followed carefully, any collector should be able to perform the conversion successfully. For those who can read a schemtic, I include the original (before) version with the bypassed components greyed out, and a modified (after) version so they can check their work.
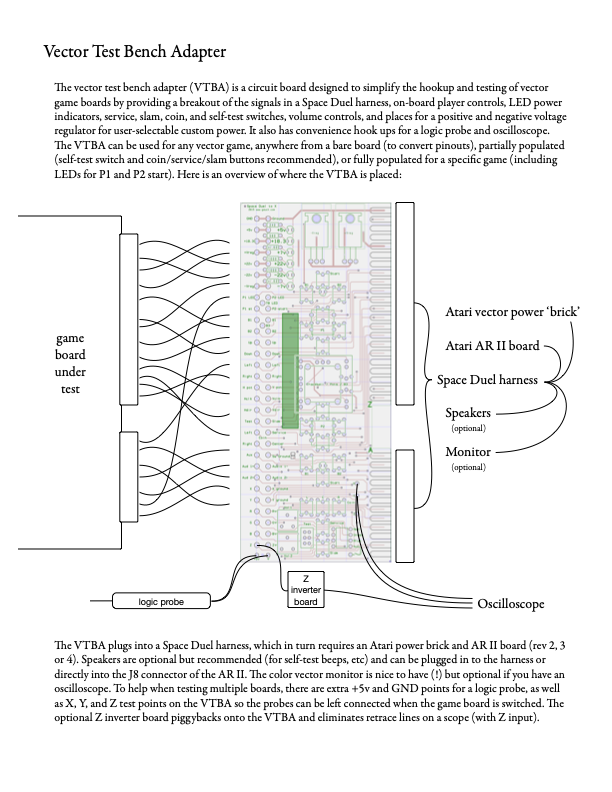
Here is a support document for a product I designed and offered to the arcade comunity. It is a printed circuit board designed to be used on a test bench, interposed between an arcade game harness and the arcade game board. It can be wired to support the different pinouts of different game boards, and can be configured in a multitude of ways to support different player controls, service switches, power indicators, and volume controls.
The document uses text and graphics in concert to immediately clarify the purpose of the product, where it is used, and what other components are optional or required to use it. Next is a page identifying different sections of the board along with some specifications about what parts can be fitted and the capabilities gained by doing so.
The last page goes into detail about how to configure a joystick controller, which is done by making connections on the back side of the board. This is stated in the text but the image of the adapter is now shown horizontally to reinforce the idea that this work is different from what came before. The area is located and magnified and the process explained, with proper examples shown and troubleshooting steps included.
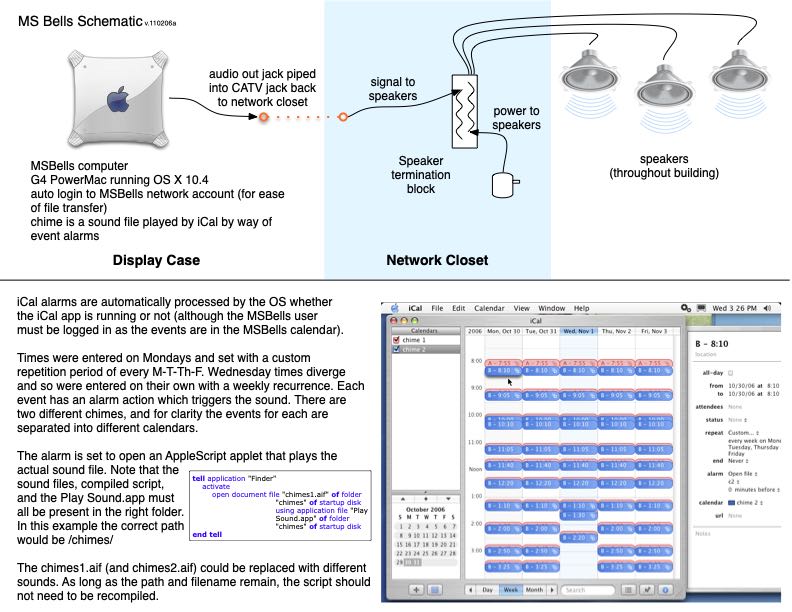
Another single page reference document that presents the entire computer-run bell system I designed. The top half is a schematic of the components of the system, where they are located and how they are connected and powered. The lower half is a kind of user guide, explaining that the bells are triggered by events in iCal and how the events were set up. The glue between the event and the generation of sound is explained, as well as how to change the sound of the bells.
This is intended as a refresher for the administrator who is familiar with the system but who interacts with it rarely enough that they don’t quite remember the details from one time to the next.
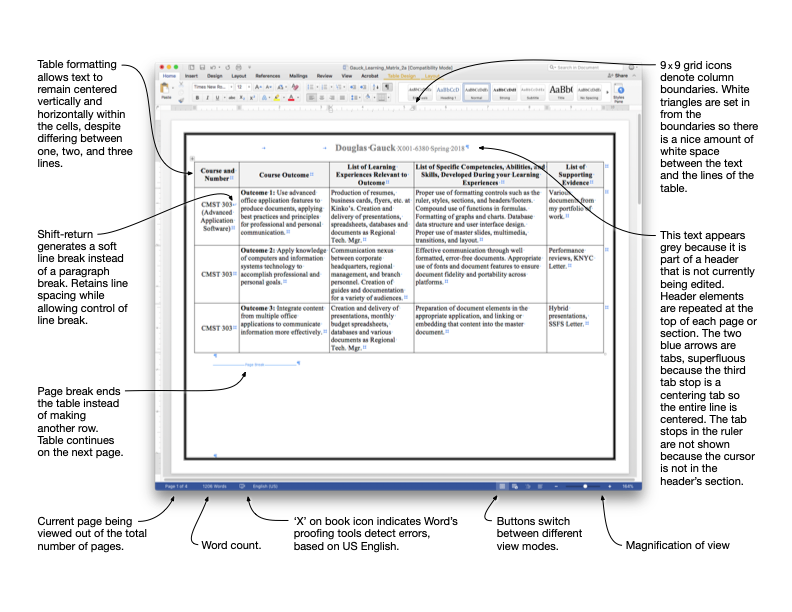
These documents were created as evidence of mastery for two parts of the Microsoft Office suite. The “x-ray” for Word takes on tables and formatting, and is a straightforward explanation of some of Word’s user interface along with the features in use on the page shown. There is also a bit of why (or why not) reasoning.
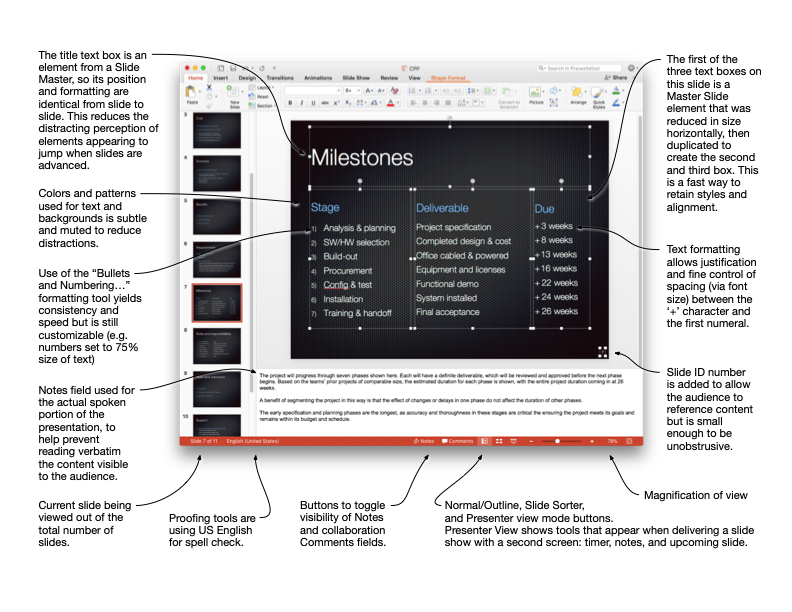
For the PowerPoint “x-ray” I added some tips on how to create a presentation, along with some editorializing on how to improve its delivery (see four of the five blurbs on the left).

Here is a more traditional piece of technical writing. From another one of my hobbies, it is a set of instructions for modifying a model train locomotive from traditional DC operation to digital control. It covers four models which are similar but not exactly the same. The process is written as one narrative with the unique steps required for some models interwoven with the overall procedure. This was done because the majority of operation is the same for all four models, and I think I’ve segregated the extra steps needed for two of the models in a clear manner.
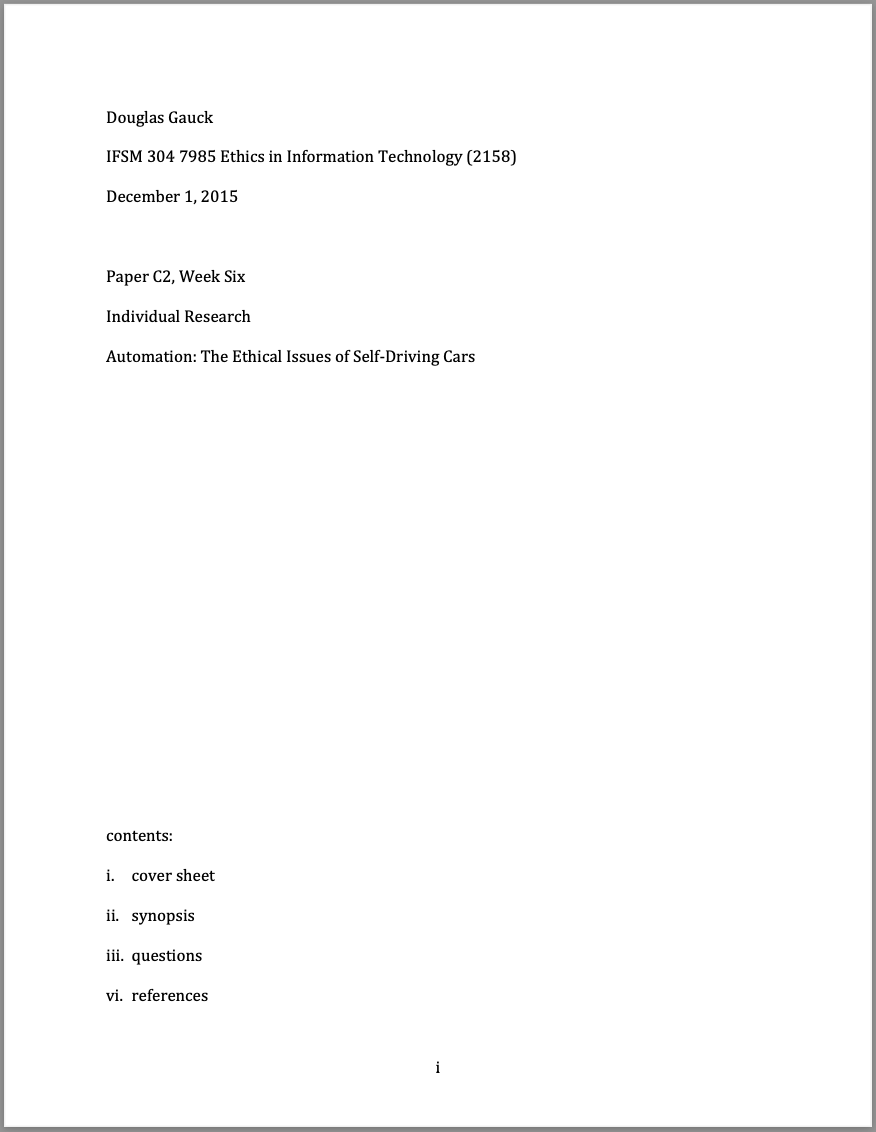
Finally, a brief analysis of the ethics of self-driving automobiles. This was written in 2015 as part of my undergraduate program.
I hope this document and those above provide insight into my abilities to research, understand, organize and communicate information. I strive to do so with with clarity and economy, and an approachable style. Thanks for reading!